

Not every home repair requires calling a professional. A number of common issues can be safely handled with basic tools and a bit of patience, saving both time and money on jobs that do not actually require specialized skills.
Unclogging a Slow Drain
Most minor clogs in sinks and tubs can be cleared with a plunger, a drain snake, or a simple mixture of baking soda and vinegar followed by hot water, without needing a plumber or harsh chemical drain cleaners.
Patching Small Drywall Holes
Nail holes, small dents, and minor drywall damage can be repaired with lightweight spackle and a bit of sanding, followed by touch-up paint. This is one of the most approachable repairs for a first-time do-it-yourselfer.
Replacing a Toilet Flapper or Fill Valve
A toilet that runs continuously or fills slowly is often caused by a worn flapper or fill valve, both of which are inexpensive parts that most homeowners can replace themselves with basic instructions and about twenty minutes.
Fixing a Squeaky Door Hinge
A few drops of household oil or a specialized hinge lubricant, worked into the hinge while opening and closing the door several times, resolves most squeaks without needing to remove or replace any hardware.
Re-caulking Around Tubs and Sinks

Removing old, cracked caulk and applying a fresh bead around a tub, shower, or sink is a straightforward job with the right tools, and it prevents water damage that can become a much larger repair if left unaddressed.
Replacing an Electrical Outlet or Switch Cover
With the power switched off at the breaker, swapping a cracked or discolored outlet or switch cover is a simple, low-risk repair that most homeowners can complete safely in a few minutes per outlet.
Touching Up Exterior Caulk and Paint
Small gaps around trim, windows, and siding let in moisture over time. Re-caulking these areas and touching up paint as needed is a manageable weekend task that prevents more significant water damage down the line.
Know When to Call a Professional
These repairs are approachable because they carry low risk if something does not go perfectly. Anything involving gas lines, major electrical work, structural elements, or a system still under warranty is worth leaving to a licensed professional rather than attempting as a first repair.
Tools Worth Having on Hand for These Repairs

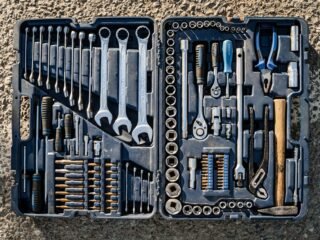
A basic repair toolkit covering all seven repairs described here is modest: a plunger and a hand-crank drain snake for clogs, a putty knife and fine sandpaper for drywall patches, an adjustable wrench and screwdriver set for toilet hardware and outlet covers, a small oil can or silicone spray for hinges, a caulking gun for seams, and a non-contact voltage tester to confirm power is off before touching any outlet or switch. None of these tools are expensive individually, and together they cover the large majority of repairs a household is likely to encounter in a given year.
More Troubleshooting Depth Per Repair
If a plunger does not clear a slow drain, checking whether the clog is closer to the drain opening, addressable with a drain snake, or further down the line, which may require a different approach or professional help, saves time compared to repeating the same ineffective method. For a running toilet that a new flapper does not resolve, the fill valve itself is the next most likely culprit, and replacing both components together, since they are both inexpensive, often resolves the issue faster than replacing one, testing, and then buying the other separately.
A squeaky hinge that persists after lubrication may have a bent pin or worn hardware rather than simply needing oil, in which case replacing the hinge pin itself, a low-cost part at most hardware stores, is the next reasonable step. Caulk that fails again shortly after a fresh application usually indicates the surface was not fully dry or clean before the new caulk was applied, making surface preparation worth double-checking before assuming the caulk product itself is at fault.
When a Small Repair Reveals a Bigger Problem
Occasionally, attempting one of these repairs uncovers something more serious, soft or rotted wood behind a caulk seam, wiring that looks damaged or outdated behind an outlet cover, or a drain clog that turns out to be a sign of a larger plumbing blockage further down the line. In these cases, stopping the do-it-yourself repair and consulting a professional is the right call rather than proceeding with a cosmetic fix over an underlying structural or safety issue. Recognizing this distinction, a repair that got more complicated than expected versus a repair that revealed an entirely different, more serious problem, is part of what separates a reasonable do-it-yourself repair from one that has moved beyond a homeowner’s safe skill level.
Building Confidence Through Practice
Watching a repair demonstrated in a video and then practicing it on a hidden or less critical spot first, a drywall patch inside a closet before attempting one in a visible living room wall, for example, builds the muscle memory and confidence needed before tackling the same repair somewhere more visible. This kind of low-stakes practice run is a reasonable way to build skill without risking a visible mistake on the first attempt.
Keeping a Simple Repair Log

Noting what was repaired, when, and with what parts, even in a simple phone note, creates a useful reference for future issues. If a toilet flapper needs replacing again eighteen months after the last one, a quick log entry reveals whether that is a normal replacement interval or a sign of a different underlying issue, such as high mineral content in the water supply degrading rubber components faster than expected.
Knowing When a DIY Repair Crosses Into Risky Territory
The line between a reasonable DIY repair and one that should go to a professional is not always about difficulty, it is often about what happens if the repair goes wrong. Replacing a cracked outlet cover or unclogging a sink trap carries very little downside risk even for a beginner, since a mistake is inconvenient at worst. Anything involving a main electrical panel, gas lines, or structural elements like load-bearing walls sits in a completely different risk category, where a mistake can cause a fire, a gas leak, or a safety hazard that is not obvious until much later. A useful gut check before starting any repair is to ask what the realistic worst-case outcome looks like if something is done incorrectly, and whether that outcome is something a repair call could fix or something that could cause lasting harm.
Permits and code compliance are another factor DIY guides sometimes skip over. Many jurisdictions require a permit for work like altering plumbing lines, adding electrical circuits, or modifying structural framing, and skipping that step is not just a legal risk, it can also cause real problems when selling a home later, since unpermitted work often has to be disclosed and can complicate a sale or an insurance claim after a covered loss. Before starting a repair that goes beyond simple cosmetic or maintenance work, a quick call to the local building department to ask whether a permit applies takes a few minutes and can save a homeowner from a much bigger headache down the line.
Building a Basic Toolkit That Covers Most Common Repairs
A relatively small, well-chosen set of tools covers the vast majority of common home repairs that fall reasonably within DIY territory, and building this kit before a repair is urgently needed avoids the frustration of shopping for a specific tool while a leak is actively spreading or a door is stuck off its hinges. A basic plunger and a set of pipe wrenches handle most minor plumbing clogs, a multi-bit screwdriver and a stud finder cover the majority of fastening and mounting repairs, and a caulking gun with a few tubes of appropriate sealant addresses gaps and minor water intrusion points around windows, tubs, and sinks. Keeping these basics organized in one location, checked periodically to replace anything used up like caulk or worn out like a frayed extension cord, means a repair can typically start within minutes of being noticed rather than after a trip to the hardware store first.
Beyond physical tools, a small folder or saved bookmark list of manufacturer manuals for major home systems and appliances proves surprisingly useful when a repair question comes up, since manufacturer-specific troubleshooting steps are often more accurate than generic advice found through a general search. Many manufacturers now offer digital manuals and troubleshooting guides directly on their websites using a model number found on an appliance label, and having that model number recorded ahead of time, rather than needing to locate the physical appliance and read a worn label at the moment of a repair need, saves meaningful time when trying to diagnose a specific problem.
Related Reading
- 7 Home Maintenance Tasks Worth Doing Before Winter
- A Simple Seasonal Home Maintenance Checklist
- How to Spot Small Home Problems Before They Become Big Ones
- Practical Tools Every New Homeowner Should Own
- How Much Does a Weekend Home Improvement Project Actually Cost?
- Aging-in-Place Renovations: What a Realistic Retrofit Actually Involves
Frequently Asked Questions
How much money do these repairs typically save compared to hiring a professional? A basic service call from a plumber or handyman often costs more than the parts for several of these repairs combined, meaning even one or two successful do-it-yourself repairs can offset the cost of the tools needed to perform them.
Is it safe to work on outlets and switches without an electrician? Switching off power at the breaker and confirming it with a voltage tester before beginning is essential, but with that precaution in place, swapping a cover plate or a like-for-like outlet is a widely considered safe task for a homeowner comfortable following basic instructions.
What is the most common repair mistake homeowners make? Using excessive force when something does not immediately work as expected, over-tightening a fitting, forcing a stuck part, is one of the most common ways a manageable repair turns into a more expensive one, since it can crack or damage a part that was otherwise fine.
Confidence Builds Over Time
Successfully handling a few small repairs tends to build the confidence needed to tackle slightly larger projects down the line. Starting with genuinely low-risk repairs, and being honest about when a job exceeds a comfortable skill level, is the safest way to build that experience. Knowing what to watch for in the first place makes this easier; see our guide on how to spot small home problems before they become big ones for the warning signs worth tracking.