
A backyard does not need a full landscaping overhaul to feel dramatically different. A handful of targeted updates, tackled over a season rather than all at once, can transform how a yard looks and how much it actually gets used.
Define the Edges
Crisp, clearly defined borders between lawn, garden beds, and walkways instantly make a yard look more intentional. Simple edging, whether it is a shallow trench, brick border, or metal edging strip, makes even an otherwise unchanged yard look noticeably more polished.
Add Layers to Garden Beds
Flat, single-height planting reads as sparse no matter how healthy the plants are. Layering taller plants toward the back, mid-height plants in the middle, and low-growing plants or groundcover at the front gives a bed depth and makes it look fuller even before everything reaches full size.
Introduce a Focal Point
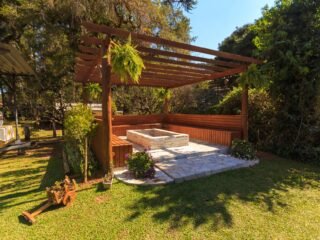
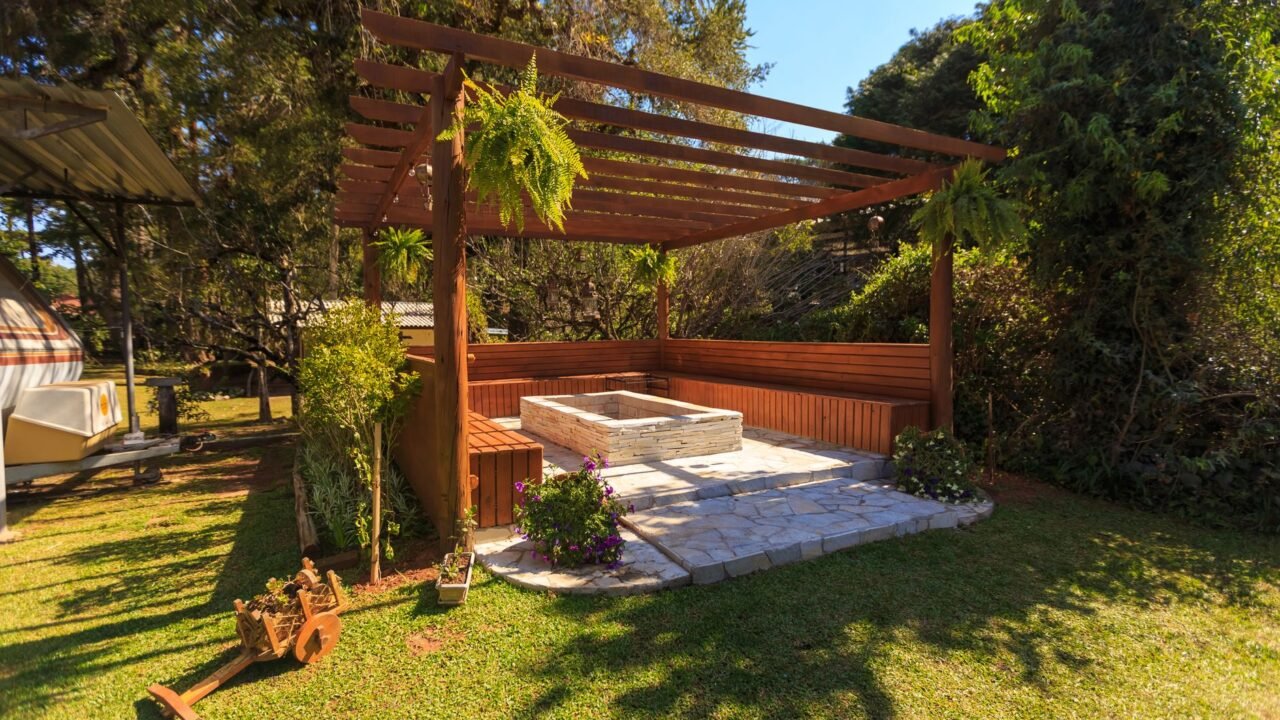
A single well-placed tree, an arbor, or even a large, well-styled planter gives the eye a place to land and makes the whole yard feel more designed rather than incidental. This does not need to be an expensive feature to be effective.
Upgrade the Lawn Edges Where It Meets Hardscape
The transition between lawn and patio, walkway, or driveway is one of the most visible seams in a yard, and it is often neglected. A clean edge here, maintained with a simple edging tool a few times a season, makes the whole yard read as better maintained.
Add Outdoor Lighting

Simple solar path lights, string lights over a patio, or an uplight aimed at a tree extend how much a backyard gets used into the evening and add a sense of atmosphere that daylight alone does not provide.
Create a Reason to Sit Outside
A yard without a comfortable place to sit rarely gets used beyond quick trips to the garden. Even a small bistro set or a couple of comfortable chairs near a focal point gives a backyard a genuine purpose beyond maintenance. For more on building out this kind of space, see our guide to creating an outdoor living space on a modest budget.
Spread the Work Across a Season
Trying to complete every update in a single weekend usually leads to a rushed result or a project that stalls halfway through. Tackling one or two of these changes each month over a full growing season keeps the workload manageable and gives each addition time to establish before the next one begins.
Seasonal Timing for Each Update
Edging and hardscape work is best tackled in spring or fall when soil is workable but not frozen or overly saturated, since digging a clean edge in either compacted dry summer soil or waterlogged early-spring mud is considerably harder than working with soil at a moderate moisture level. Adding layers to garden beds works best when done at planting time in spring for the growing season ahead, though structural layering with shrubs and evergreens can be done in fall in most climates, giving roots time to establish before the following summer’s heat.
Outdoor lighting installation has no strict seasonal requirement, but tackling it before the evenings get dark early in fall means more immediate enjoyment of the new lighting relative to the effort invested. Focal points involving new plantings, a specimen tree or a large shrub, generally establish best when planted in fall or early spring, avoiding the stress of a summer planting in full heat.
Common Backyard Update Mistakes
Skipping the edging step while focusing only on plants is a common mistake, since even a beautifully planted bed can look unfinished without a crisp border defining where it ends. Conversely, some homeowners over-invest in hardscape while neglecting plant layering, resulting in a yard that looks more like a construction project than a garden.
Choosing a focal point that is out of scale with the yard is another frequent issue: an oversized arbor in a small backyard can overwhelm the space rather than anchoring it, while an undersized focal point in a large yard can get visually lost. Standing at the main viewing point, typically a patio door or a favorite window, and picturing the proposed focal point at its mature size before committing helps avoid this.
Cost-Tier Breakdown
Edging represents one of the lowest-cost updates on this list, with basic metal or plastic edging running relatively little per linear foot for a do-it-yourself installation, while a brick or paver border costs more in both materials and labor. Layering garden beds costs vary enormously depending on plant size and maturity at purchase, but starting with smaller, younger plants and allowing a season or two of growth is consistently the most budget-friendly path to a fuller-looking bed. Outdoor lighting spans a wide range, from inexpensive solar path lights at the low end to professionally installed low-voltage landscape lighting systems at the high end, with a reasonable middle ground being plug-in or battery LED string lights for a patio or key tree.
Working With What Already Exists
Not every backyard update requires starting from scratch. An existing but overgrown garden bed often just needs to be thinned and re-edged rather than removed entirely, and mature shrubs that have outgrown their space can sometimes be pruned into a more appropriate scale rather than replaced. Assessing what is already healthy and simply needs refreshing, rather than defaulting to full replacement, both saves money and preserves the head start that established plants provide over anything newly planted.
Maintaining Updates Once They Are In Place
A freshly edged bed needs periodic maintenance, generally a few passes with an edging tool each season, to keep the clean line from growing back over. Newly layered beds benefit from a season or two of attentive watering while plants establish root systems, after which maintenance typically decreases. Outdoor lighting, particularly solar options, benefits from an annual check of panels and connections to ensure continued reliable operation, since dirt buildup on solar panels is a common and easily overlooked cause of dimming lights over time.
Choosing Materials That Match the Home’s Style

Edging, focal points, and hardscape materials read most cohesively when they echo something already present in the home’s exterior, matching a brick edging border to the home’s brick facade, or choosing a metal arbor finish that complements existing exterior light fixtures or railings. A backyard that borrows even one or two material cues from the house itself tends to feel like a deliberate extension of the home rather than a separate, unrelated project.
Small Yards vs. Large Yards
A small backyard benefits from choosing fewer, higher-impact updates rather than attempting all of them at a reduced scale, since a small space with too many competing features can feel cluttered rather than considered. A single well-chosen focal point paired with clean edging often accomplishes more in a compact yard than spreading a modest budget across every category. A larger yard has more room to incorporate several of these updates simultaneously, but benefits from grouping them into distinct areas rather than scattering isolated features across the full space, which helps a large yard feel intentionally zoned rather than sparse.
Matching Updates to Your Climate and Soil Type
Not every backyard update works everywhere, and one of the fastest ways to waste money on a garden project is copying an idea that was designed for a completely different climate. A raised bed layout that thrives in a humid, rainy region can rot or drain poorly in an arid one, while a rock garden that looks effortless in the Southwest can look out of place and struggle to establish in a wetter, cooler region. Before committing to any update, it helps to spend a season simply observing how water moves through the yard after rain, which corners stay shaded most of the day, and where frost tends to linger longest in early spring. That kind of casual observation costs nothing and prevents a lot of expensive trial and error later.
Soil type matters just as much as climate, and it is worth doing a simple test before buying plants or materials. A handful of moist soil squeezed in the palm tells you a lot: soil that holds a tight ball and stays that way is likely heavy clay, soil that falls apart immediately is sandy, and soil that holds a loose shape but breaks apart with a light poke is closer to the loam most plants prefer. Clay-heavy yards benefit enormously from raised beds or generous compost mixed into the top layer, while sandy soil needs organic matter added regularly since it drains nutrients quickly. Skipping this step is one of the most common reasons backyard updates that looked great in the first month start declining by midsummer.
Sequencing Projects So Each One Builds on the Last
Backyard updates tend to work better as a sequence rather than a scattered set of independent projects, since the order tasks happen in can determine whether later work is easy or unnecessarily difficult. Grading and drainage work should happen before any planting or hardscaping, since correcting water flow after a patio or garden bed is already installed usually means tearing out finished work to fix a problem that could have been addressed at the start for a fraction of the cost. Similarly, installing any underground utilities, irrigation lines, or lighting wiring, before finishing surface-level landscaping avoids the need to dig through newly placed mulch, sod, or pavers later, which is both wasteful and a common source of frustration for homeowners tackling a yard in phases.
Thinking through this sequence on paper before buying materials for the first project, even a rough sketch listing the order of planned updates over the next year or two, helps avoid the common trap of doing the easiest, most visible project first simply because it is satisfying, only to discover it needs to be partially redone once a less glamorous but more foundational project gets addressed afterward. A yard update plan does not need to be elaborate to be useful, but having even a loose sense of sequence saves both money and repeated labor across a multi-project backyard transformation.
Related Reading
- How to Start a Small Vegetable Garden From Scratch
- Creating an Outdoor Living Space on a Modest Budget
- Low-Maintenance Landscaping Ideas for Busy Homeowners
- Gravel Gardens Are Going Viral: A Realistic Look at Low-Water Landscaping
- How Much Does It Cost to Landscape a Backyard on a Budget?
- Rainwater Harvesting at Home: What a Realistic Setup Actually Costs and Requires
Frequently Asked Questions
How long does it take for a newly layered garden bed to look full? Depending on the plants chosen and the local growing season, most beds planted with a mix of young perennials and shrubs need one to three growing seasons to fill in and look intentionally lush rather than sparse.
Is professional help needed for any of these updates? Most edging, lighting, and planting projects are approachable for a confident do-it-yourselfer. Larger hardscape features, a permanent patio or a substantial arbor structure, are more often worth hiring out, particularly where they involve significant excavation or structural elements.
What is the most budget-friendly way to start a backyard transformation? Edging existing beds and adding a single focal point, even an inexpensive one like a large planter, typically delivers the most visible improvement relative to cost, making it a reasonable starting point before investing in lighting or extensive new plantings.
Start With the Update That Bothers You Most
Rather than trying to plan an entire backyard transformation at once, identifying the single element that currently bothers you most, a messy edge, a bare corner, a lack of seating, and addressing that first tends to produce the most satisfying, motivating results.